Getting started
Setting up your project and development environment
In a new directory, create a file called README.rst with the following
content.
Lumache
=======

**Lumache** (/lu'make/) is a Python library for cooks and food lovers that
creates recipes mixing random ingredients.
It is a good moment to create a Python virtual environment and install the
required tools. For that, open a command line terminal, cd into the
directory you just created, and run the following commands:
$ python -m venv .venv
$ source .venv/bin/activate
(.venv) $ python -m pip install sphinx
Note
The installation method used above is described in more detail in PyPI package. For the rest of this tutorial, the instructions will assume a Python virtual environment.
If you executed these instructions correctly, you should have the Sphinx command line tools available. You can do a basic verification running this command:
(.venv) $ sphinx-build --version
sphinx-build 4.0.2
If you see a similar output, you are on the right path!
Creating the documentation layout
Then from the command line, run the following command:
(.venv) $ sphinx-quickstart docs
This will present to you a series of questions required to create the basic
directory and configuration layout for your project inside the docs folder.
To proceed, answer each question as follows:
> Separate source and build directories (y/n) [n]: Write “y” (without quotes) and press Enter.> Project name: Write “Lumache” (without quotes) and press Enter.> Author name(s): Write “Graziella” (without quotes) and press Enter.> Project release []: Write “0.1” (without quotes) and press Enter.> Project language [en]: Leave it empty (the default, English) and press Enter.
After the last question, you will see the new docs directory with the
following content.
docs
├── build
├── make.bat
├── Makefile
└── source
   ├── conf.py
   ├── index.rst
   ├── _static
   └── _templates
The purpose of each of these files is:
build/An empty directory (for now) that will hold the rendered documentation.
make.batandMakefileConvenience scripts to simplify some common Sphinx operations, such as rendering the content.
source/conf.pyA Python script holding the configuration of the Sphinx project. It contains the project name and release you specified to
sphinx-quickstart, as well as some extra configuration keys.source/index.rstThe root document of the project, which serves as welcome page and contains the root of the “table of contents tree” (or toctree).
Thanks to this bootstrapping step, you already have everything needed to render the documentation as HTML for the first time. To do that, run this command:
(.venv) $ sphinx-build -M html docs/source/ docs/build/
And finally, open docs/build/html/index.html in your browser. You should see
something like this:
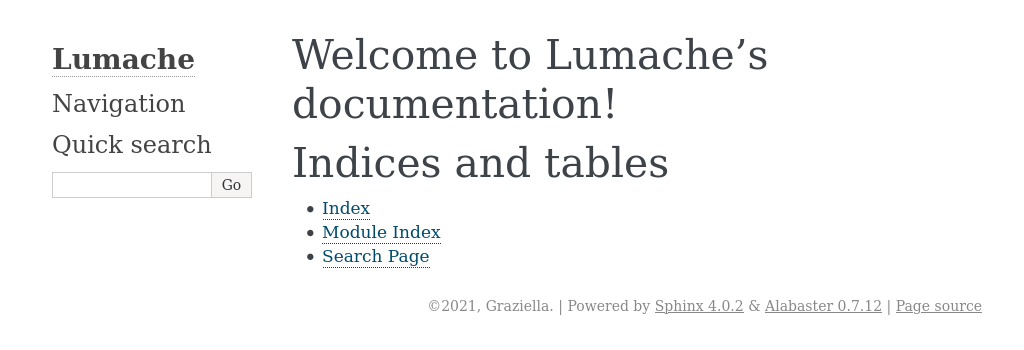
Freshly created documentation of Lumache
There we go! You created your first HTML documentation using Sphinx. Now you can start customizing it.